Transaction Merge Wizard Step 2
The Transaction Merge Wizard will merge transactions from the Patient Transaction screen with a letter that you create in MOGO’s Word Processor.
After Selecting Display Fields in Step 1, you will go to Select Criteria in Step 2.
Step 2 in the Transaction Merge Wizard has fields of criteria that can be selected in order to further customize them for you specific needs. For example, you may want to only show transactions within a certain date range or you may want to show only specific treatment plans. Note: These criteria fields are set by MOGO and cannot be changed or removed.
You will select the fields of information from the white box under 1)The available Criteria and then move them to 2)Selected Criteria. When you go to Step 3, you will then be setting up the specific criteria for each selected field from Step 2.
To select you will click on the field under the “Header” column. The field under “Header” will be highlighted in blue. Note: You must click under the “Header” column in order for a field to be highlighted.
You can then click on the button with the right double arrows to move your selection over to 2)Selected Criteria.
You can also double click to select, or even click and drag selected fields to move them. To deselect fields, you will highlight them from 2)Selected Criteria and then click on the button with the left double arrow to deselect. You can also double click to deselect, or even click and drag from 2)Selected Criteria to 1)The available Criteria.
The instructions for selecting and deselecting fields is shown at the bottom of the window. If you make a mistake, you can always go back and change these selections at any time. Note: You will always make changes by opening the Transaction Merge Wizard again. You will first click in the table in the document, and then select Tool and Transaction Merge Wizard from the menu bar again.
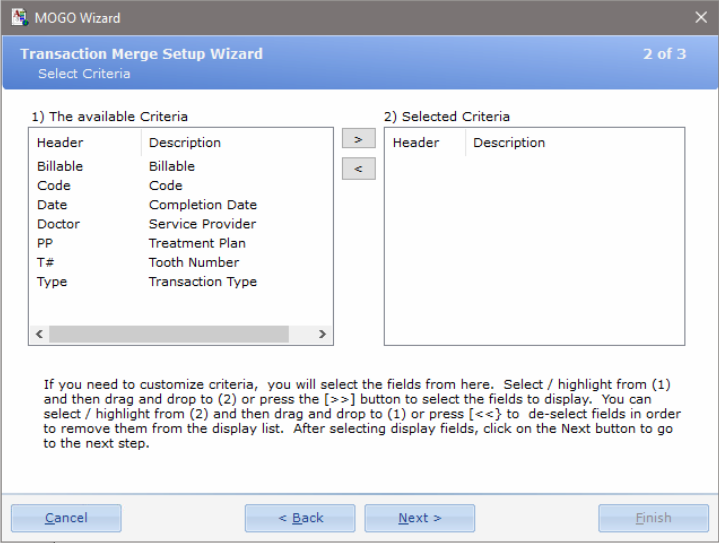
After selecting fields of information, click on Next> button to go to Step 3. There is a <Back button that you can click on if you decide to go back to Step 1.