Insurance Company List – Adding A New Insurance Company
To create a new Insurance Company from the Insurance Company List click the New ![]() icon.
icon.
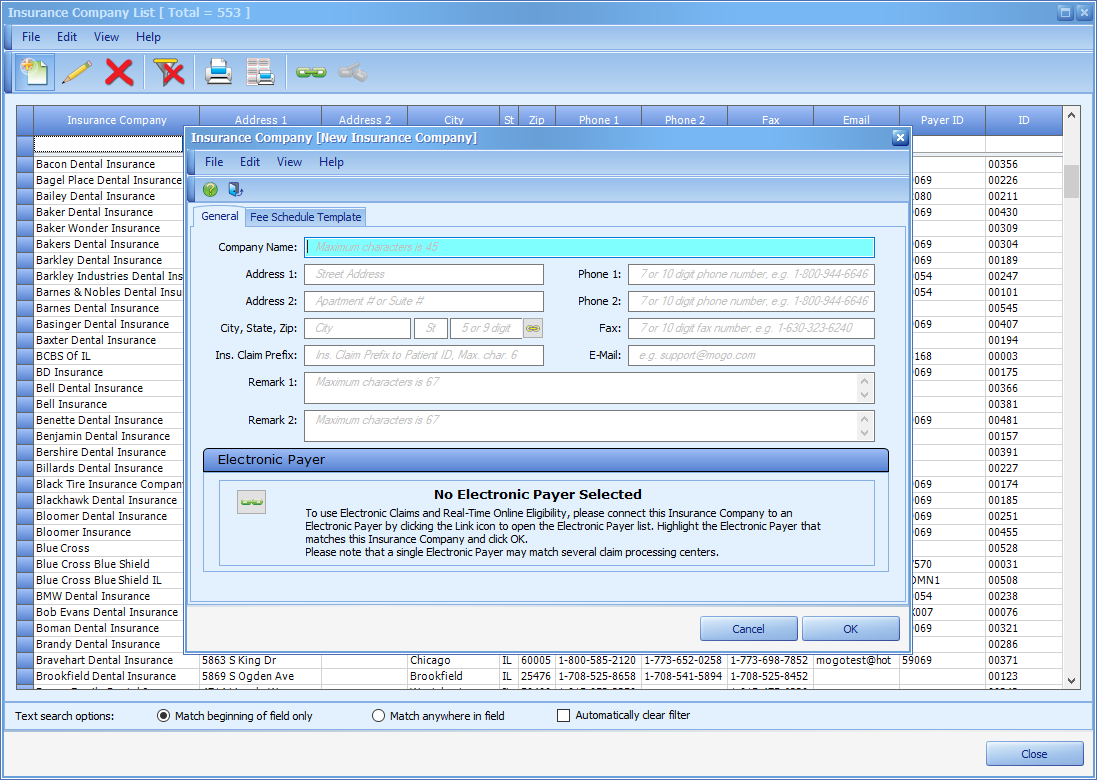
On the New Insurance Company screen there are two tabs of information to enter: General and Fee Schedule Template. General is where you will enter contact information and the Payer ID for the insurance company, and Fee Schedule Template is where you can set up coverage detail templates for the group plans that eventually get created under this company.
General
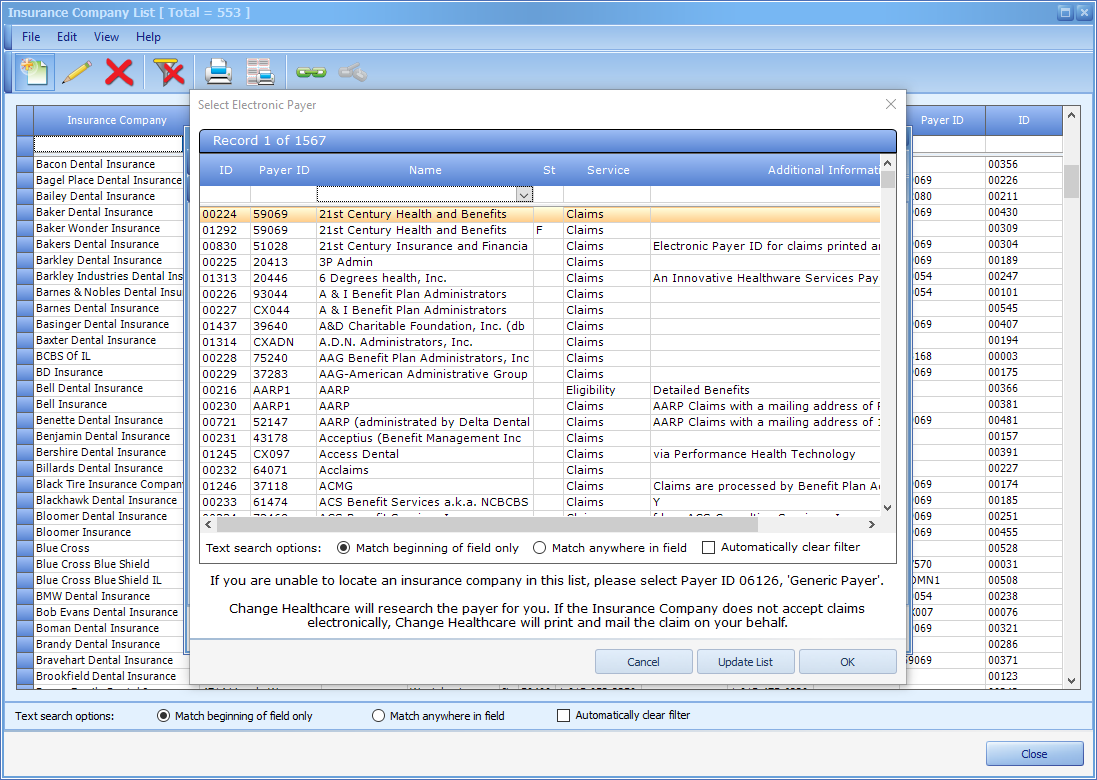
On the General tab you will enter two types of information. On the top section you will enter any and all contact information you have for the Insurance Company. At minimum you must enter a Company Name, but it is advised to enter as much information as you can to make a more complete record. The bottom section is where you will link the Electronic Payer ID (if you are using Change Healthcare for eClaims or eEligibility). To enter the Electronic Payer ID click on the Link ![]() icon. On the Select Electronic Payer window, locate the correct payer ID and click OK. Note: If you are signed up for eEligibility you will want to choose the payer ID with ‘Eligibility’ in the Service field.
icon. On the Select Electronic Payer window, locate the correct payer ID and click OK. Note: If you are signed up for eEligibility you will want to choose the payer ID with ‘Eligibility’ in the Service field.
(Click image for full size)
(Click image for full size)
Once the General Tab has been filled out you can click OK to save the new Insurance Company. If you would like to assign a Fee Schedule Template to this company, you can click on the Fee Schedule Template tab.
Fee Schedule Template
Each Insurance Company will have several Group Plans connected with them, as each Employer has unique plans. However, we understand that if Insurance Company ‘XYZ’ offers a ‘Gold’ plan, the coverage details will be the same (or similar) regardless of which Employers offer that ‘Gold’ plan to it’s employees. This is why you can create Fee Schedule Templates; so that you can apply the coverage details to all plans regardless of the Employer. This will also allow you to update Fee or Maximum amounts for all employer group plans that share the same plan template easily from one screen.
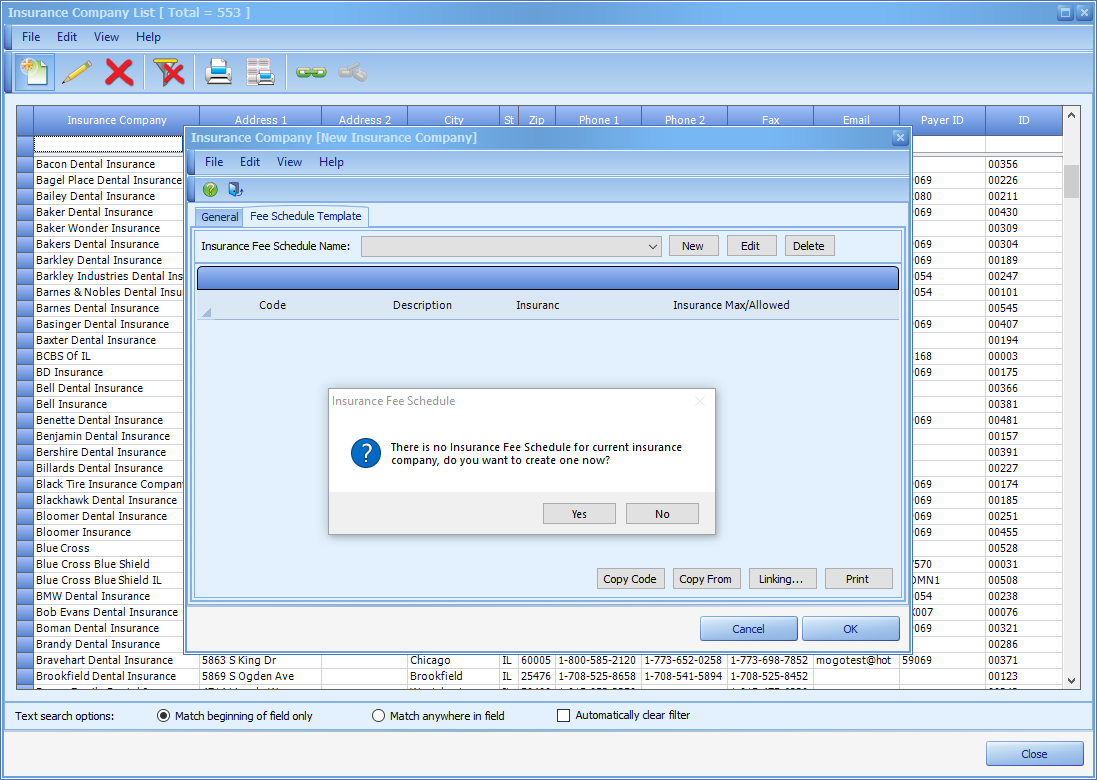
When you click on the Fee Schedule Template tab you will be prompted to create a new template. Click Yes to do so.
(Click image for full size)
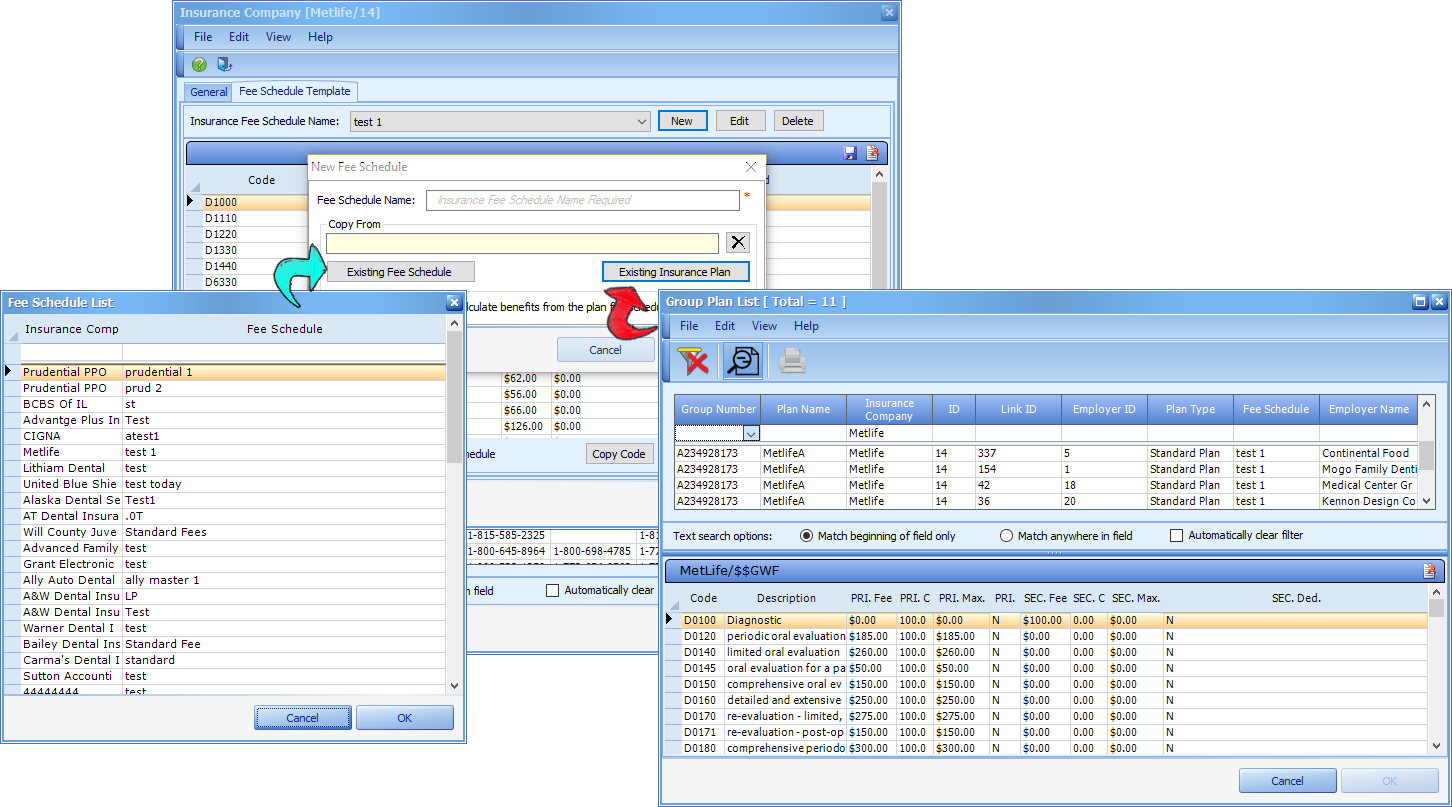
When creating a new fee schedule template you will be required to give the template a name. This is where you would enter the type of plan it is. For example: Gold, Premier, Advantage, etc. You can also copy the details from another Fee Schedule Template or from an existing insurance plan. This way, if you have a Fee Schedule Template that has identical details or an already created Group Plan that has identical details you can copy from them so you don’t have to start from scratch.
(Click image for full size)
The checkbox for ‘Use my normal fees, but calculate benefits from the plan fee schedule (if available)’ denotes how you want benefits to calculate.
- If checked, the Transaction Screen will always display your UCR fees in the FEE field but estimated insurance will calculate based on the details assigned on the plan fee schedule. The difference between your UCR fee and the PRI/SEC Fee (Standard Plan) or the Approved/Accepted fee (Participating Plan w/ Adjustment) will be added to the patient’s responsibility.
- If unchecked, the Transaction Screen will display the PRI/SEC Fee (Standard Plan) or the Approved/Accepted fee (Participating Plan w/ Adjustment) and calculate the estimated insurance amounts based on the details assigned on the plan fee schedule.
After clicking OK you will be brought to the Fee Schedule template window. If you copied from another Fee Schedule template or from an existing plan the list will be populated with the coverage information from that source. If not, the list will be blank. To begin editing the template, you will want to either bring in all of the service codes from your service code list (by clicking the Copy Code button) or you can click on the Copy From button, which will allow you to copy from another Fee Schedule template or an existing plan (as we did before).
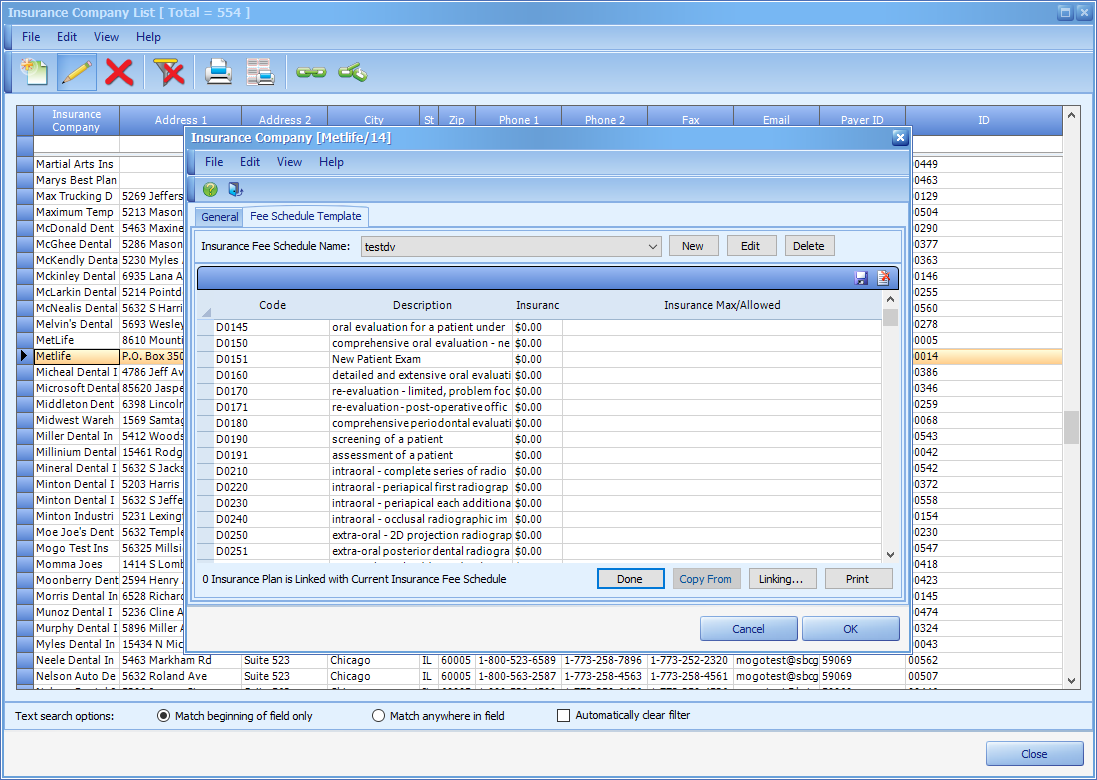
(Click image for full size)
When you are editing the information for each code you will be concerned with the Insurance Fee/Approved and the Insurance Max/Allowed fields.
- Insurance Fee/Approved
- This is the amount the insurance company allows you to charge their subscribers for this service code. If this template is applied to a Standard plan this is the amount that will show in the patient’s Transaction screen in the Fee field. If it is applied to a Participating w/ Adjustment type plan this is what determines the write off/adjustment amount. The difference between your normal office fee (UCR) and this Approved amount will be the automatic write off.
- Insurance Max/Allowed
- For a Standard plan this is the maximum amount that the insurance company will pay out for this service code. On a Participating w/ Adjustment type plan, this is what the estimated coverage is based off of.
Once you have updated the Fee/Approved and Max/Allowed fields for all applicable service codes, click on the Done button. This will save the fee schedule and remove all service codes you did not update.
As this is a brand new insurance company, you will not have any group plans linked to it yet. If you did, you could simply click the Linking… button to bring up the Fee Schedule links screen. On the linking screen, you can link individual group plans by clicking in the Linked field next to each one, or link to all by clicking the Link All button.

(Click image for full size)
After setting up your Insurance Company’s information and Fee Schedule Templates, you can click OK to save the new Insurance Company.