E-Mail Icons
MOGO’s Digital Communication Suite (DCS) includes a powerful e-mail feature. E-mail can be accessed by clicking on the ![]() icon on the Patient Lookup List.
icon on the Patient Lookup List.
MOGO’s E-Mail Setup Wizard will help you enter the information required to access your e-mail account. Click here to learn more about Getting Started with E-Mail.
The icons used for e-mail purposes are available in the toolbar on the Digital Communication Suite E-mail screen. There are also other icons on the Compose Message screen.
Click on the drop-down menu next to the e-mail icon on the Patient Lookup List to select from Send email to [selected patient name], Compose email, Send & Receive email, Options, and Setup Email Accounts.
As you update your patients’ records, ask for their e-mail addresses and cell phone numbers. You can then enter the e-mail address, as well as other numbers, in their Contact Information screen. You can even mark a “preferred contact” number!
MOGO’s eReminders allows you to send appointment confirmations and reminders via e-mail and text message!
MOGO can automatically send and receive e-mails in the background without opening DCS. The DCS Options window allows you to enable and set the frequency of this feature.
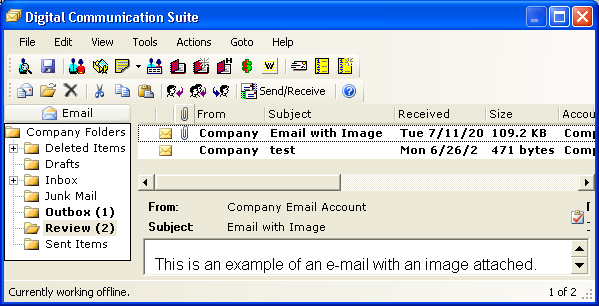
Attached images can be previewed by clicking on the Preview icon to the left of the image filename:
![]()
Toolbars can be rearranged by clicking and dragging them to a new position. Just point your cursor to the broken vertical line at the beginning of the toolbar until you see the “cross” cursor. Then click and drag the toolbar so that it is on two lines or on one line.
Tip: The option to view Standard and Advanced toolbars is under View, Toolbars in the DCS menu bar.
(click for full size image)
![]() Connect to Patient – This option allows the connection of the selected e-mail message to a patient. The connected patient name is then shown under the MOGO Name column on the e-mail screen.
Connect to Patient – This option allows the connection of the selected e-mail message to a patient. The connected patient name is then shown under the MOGO Name column on the e-mail screen.
- The Patient List will display so you can select the patient.
- The current e-mail address for the patient will be displayed. If there is no e-mail entered for the selected patient, you will be given the option to update the patient’s e-mail information.
- MOGO will ask if you want to save the e-mail to the selected patient’s Notes. If you answer yes to save it to Notes, MOGO will ask, “Would you like to remove it from this list?”
- You can also save to Notes by clicking on the Save icon.
![]() Save – To save the e-mail text to the patient’s Notes. The patient name is shown under the MOGO Name column.
Save – To save the e-mail text to the patient’s Notes. The patient name is shown under the MOGO Name column.
- If a patient name is not connected (there is not a name under the MOGO Name column), the patient search window will open first.
- The selected name will be shown under the MOGO Name field.
- MOGO will ask if you would like to remove the message from the list.
![]() Patient Information Screen – To go to the Patient Information screen for the patient under the MOGO Name column. If the patient name has not been connected, this choice will be inactivated.
Patient Information Screen – To go to the Patient Information screen for the patient under the MOGO Name column. If the patient name has not been connected, this choice will be inactivated.
![]() Transaction – To go to the Transaction screen for the patient under the MOGO Name column. If the patient name has not been connected, this choice will be inactivated.
Transaction – To go to the Transaction screen for the patient under the MOGO Name column. If the patient name has not been connected, this choice will be inactivated.
![]() View Notes – Opens the Notes screen for the patient under the MOGO Name column. If the patient name has not been connected, this choice will be inactivated. The drop-down arrow next to this icon can be used to View Notes, Enter Notes, and View Clinical Chart.
View Notes – Opens the Notes screen for the patient under the MOGO Name column. If the patient name has not been connected, this choice will be inactivated. The drop-down arrow next to this icon can be used to View Notes, Enter Notes, and View Clinical Chart.
![]() Family Table – Opens the Family Table for the patient under the MOGO Name column. If the patient name has not been connected, this choice will be inactivated.
Family Table – Opens the Family Table for the patient under the MOGO Name column. If the patient name has not been connected, this choice will be inactivated.
![]() Appointment Book – To go to MOGO’s Appointment Book. The selected patient’s name will be in memory.
Appointment Book – To go to MOGO’s Appointment Book. The selected patient’s name will be in memory.
![]() New Appointment -The Appointment Information screen will open so that you can schedule an appointment for the selected patient in MOGO’s Appointment Book.
New Appointment -The Appointment Information screen will open so that you can schedule an appointment for the selected patient in MOGO’s Appointment Book.
- If a patient has not been connected to this e-mail, the patient search window will open first.
- The Appointment Information screen will then open. The Procedure/Notes field in the Appointment Information screen will contain the subject line of the e-mail. Enter the information as usual and click [OK]. The appointment is now in MOGO’s Appointment Book.
- Information regarding this appointment is also saved in the patient’s Notes under the Patient cabinet, Comment folder, and ApNote subfolder. The Notes will contain the information from the Procedure/Notes field in the Appointment Information screen (this defaults to the subject line of the e-mail). The Linked Detail field in Notes will contain the appointment date and time.
- After it is saved to Notes, MOGO will ask if you would like to remove the e-mail from the list.
![]() Appointment History – Opens the Appointment History screen for the patient under the MOGO Name column. If the patient name has not been connected, this choice will be inactivated.
Appointment History – Opens the Appointment History screen for the patient under the MOGO Name column. If the patient name has not been connected, this choice will be inactivated.
![]() Family Aging – Opens the Family Aging for the patient under the MOGO Name column. If the patient name has not been connected, this choice will be inactivated.
Family Aging – Opens the Family Aging for the patient under the MOGO Name column. If the patient name has not been connected, this choice will be inactivated.
![]() Appointment Waiting List – Opens the Appointment Waiting List for the patient under the MOGO Name column. If the patient name has not been connected, this choice will be inactivated.
Appointment Waiting List – Opens the Appointment Waiting List for the patient under the MOGO Name column. If the patient name has not been connected, this choice will be inactivated.
![]() Quick Letter – MOGO’s Word Processor file selection list will open so that you can select a filename in order to Print a Quick Letter or Send a Quick Letter via E-Mail.
Quick Letter – MOGO’s Word Processor file selection list will open so that you can select a filename in order to Print a Quick Letter or Send a Quick Letter via E-Mail.
- After selection, the Quick Letter will be attached to your e-mail message.
- To then send your e-mail click the [Send] button.
- Quick Letters can be sent via e-mail if the user has been given login rights by the Supervisor to Send E-Mail.
![]() To Do List – To go to MOGO’s To Do List.
To Do List – To go to MOGO’s To Do List.
![]() New To Do List Item – To send the selected e-mail to MOGO’s To Do List.
New To Do List Item – To send the selected e-mail to MOGO’s To Do List.
- You will be able to select the To Do List code, as well as the provider.
- The description for this To Do List item will default to the subject line of the e-mail.
- After it has been sent to the To Do List, the message is saved to the patient’s Notes under the Patient cabinet, Letter folder, and Email subfolder. The Notes will contain the contents of the e-mail message.
- After it is saved to Notes, MOGO will ask if you would like to remove the e-mail from the list.
![]() New – To open the Compose Message screen.
New – To open the Compose Message screen.
![]() Open – To open the selected e-mail.
Open – To open the selected e-mail.
![]() Delete – To delete selected text.
Delete – To delete selected text.
![]() Cut – To delete and copy selected text.
Cut – To delete and copy selected text.
![]() Copy – To copy selected text.
Copy – To copy selected text.
![]() Paste – To paste text that has been copied.
Paste – To paste text that has been copied.
![]() Reply – To reply to the selected e-mail.
Reply – To reply to the selected e-mail.
![]() Reply to All – To reply to all e-mails in the list.
Reply to All – To reply to all e-mails in the list.
![]() Forward – To forward the selected e-mail.
Forward – To forward the selected e-mail.
![]() Send/Receive – Send and Receive e-mail. Tip: The Options choice under Tools allows you to automatically send and receive e-mails in the background.
Send/Receive – Send and Receive e-mail. Tip: The Options choice under Tools allows you to automatically send and receive e-mails in the background.
![]() Help – To go to MOGO’s context sensitive E-mail Help.
Help – To go to MOGO’s context sensitive E-mail Help.
![]() Workstations – View a list of all computers that have logged into your MOGO database. MOGO Cloud users can remotely log computers out and even shut MOGO down.
Workstations – View a list of all computers that have logged into your MOGO database. MOGO Cloud users can remotely log computers out and even shut MOGO down.
Right mouse menu options:
Click with the right mouse in the pane view (folders) to open a menu.
- Some of the options in the menu may be inactivated, depending on the folder you select. For example, the main Company folder cannot be deleted.
- The options are: Open, Delete Folder, Rename Folder, New Folder, Mark All as Read, and Mark All as Unread.
There is also a right click menu in the message list.
- The options are: Open, Delete, Reply, Forward, Reply to All, and Mark as Reviewed.
- Messages that have not been marked as “Reviewed” are in bold.
- After the message is marked as “Reviewed” it is sent to the Outbox folder.